
Note: This technique can be used on most poultry including turkey, chicken, duck, pheasant, and game hens.
Begin by cutting off the tail bone at the point where it joins the body of the bird.

Cut off both wing tips at the joint.
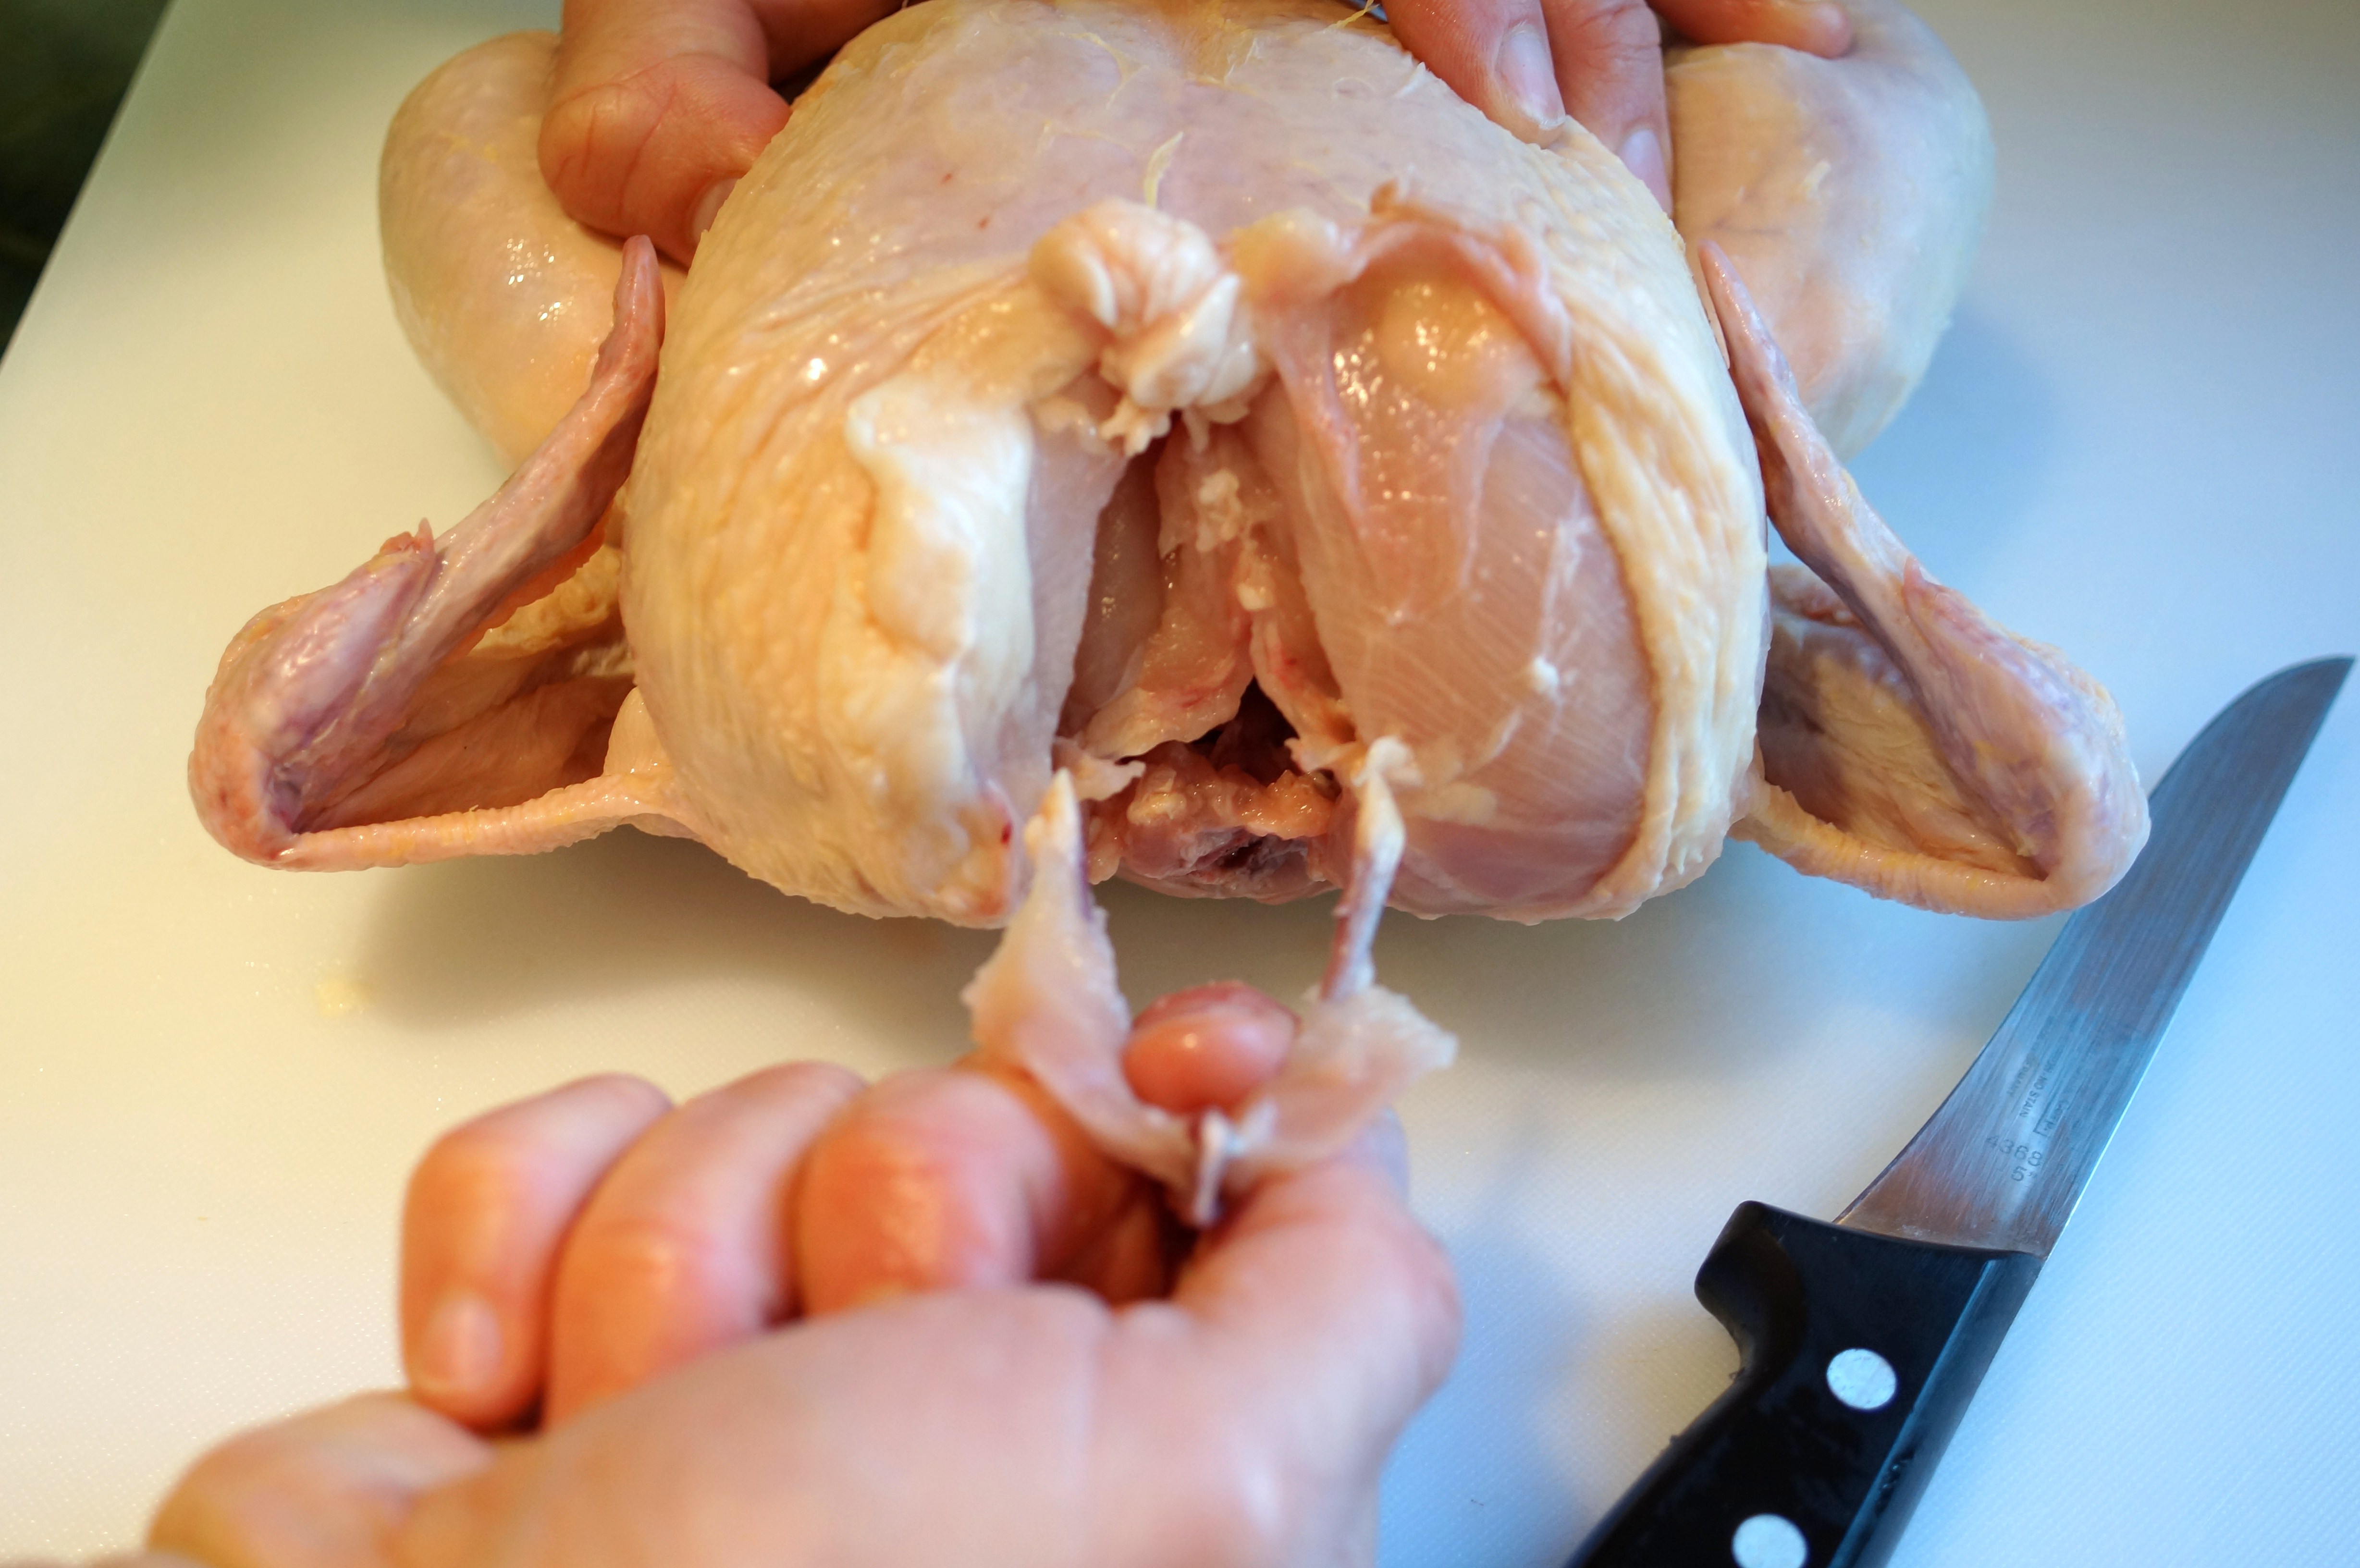
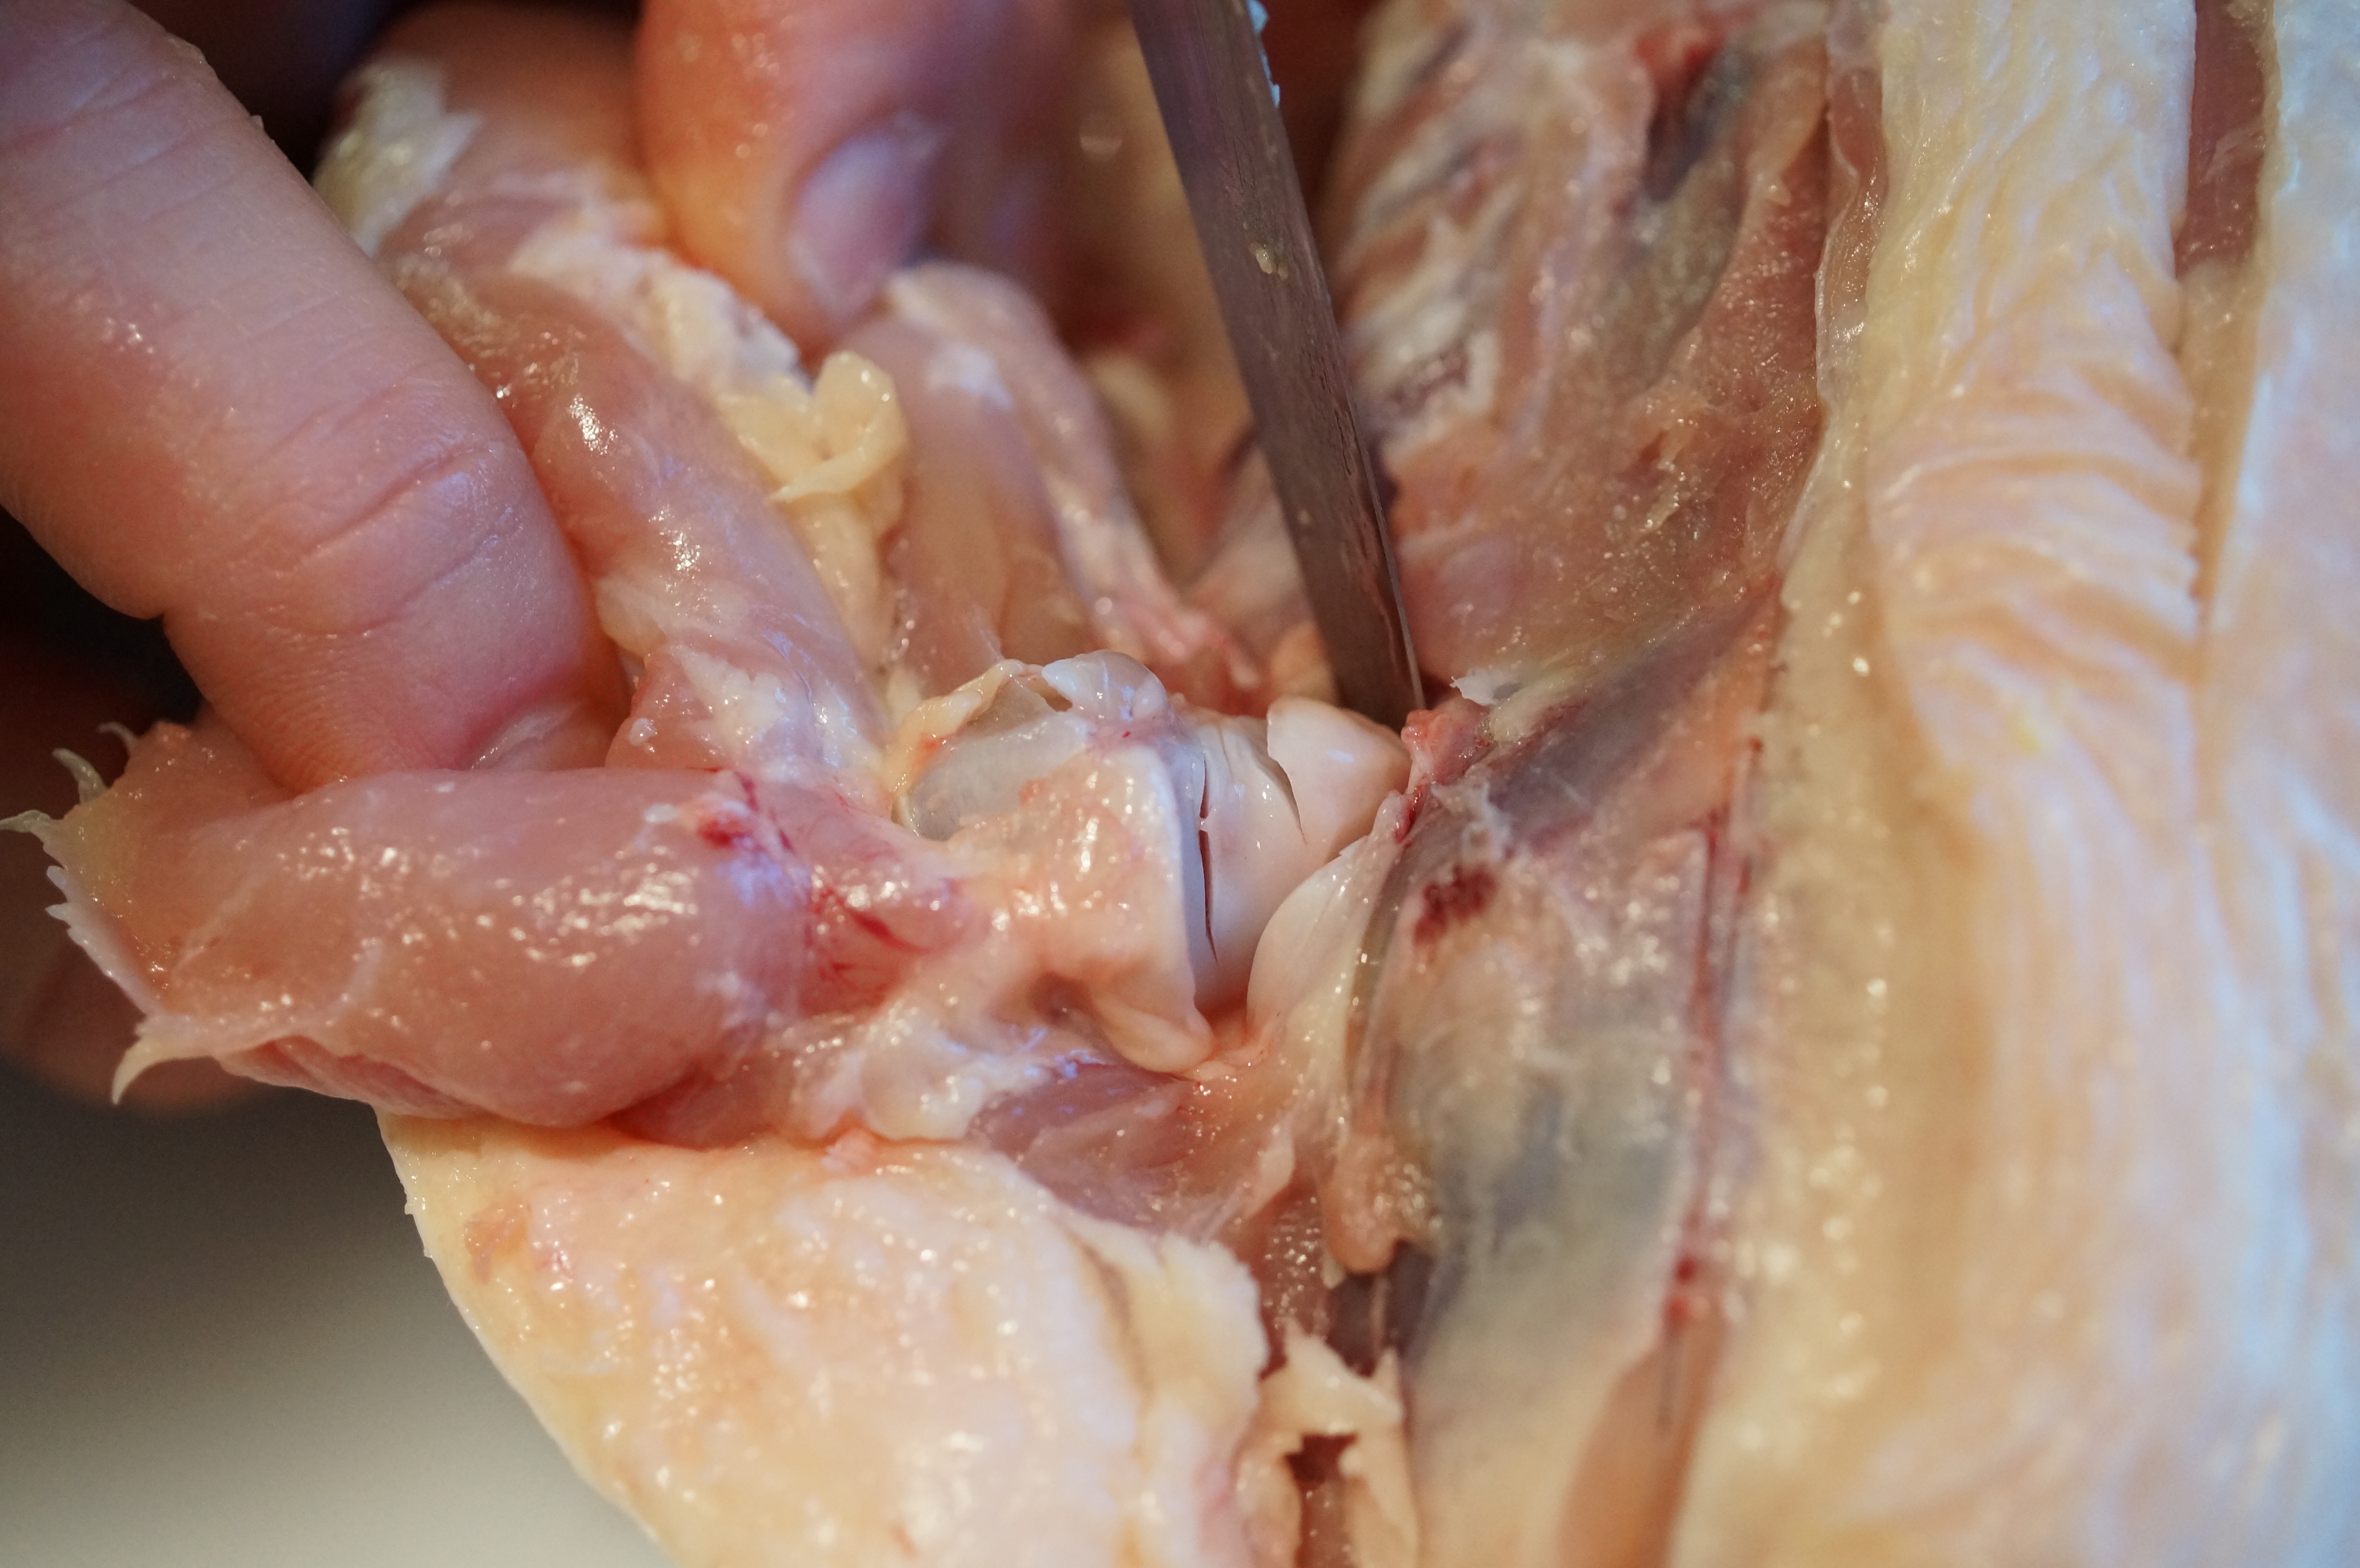
Remove the wish bone by first spreading the loose skin by the neck opening apart with your fingers. Locate the bone by pressing lightly on the breast meat surrounding the neck opening. The wishbone will feel like an upside down “V” buried just beneath the surface. Run the point of your knife along the inside and outside edges of the wishbone. Make sure the knife penetrates only slightly deeper than the bone itself.

The next step is to free the top of the wishbone. Insert the knife tip on top of the wishbone at the point where both sides of the “Vee” come together. Gently push the knife into the chicken on a slight downward angle. The knife tip should severe the top of the wishbone from the rest of the skeletal structure. Insert your finger into the inner “V” and pull the top of the bone forward like you were throwing a switch. This should free most of the wishbone. Snap off the remaining bottom connections. Remove and discard the wishbone.
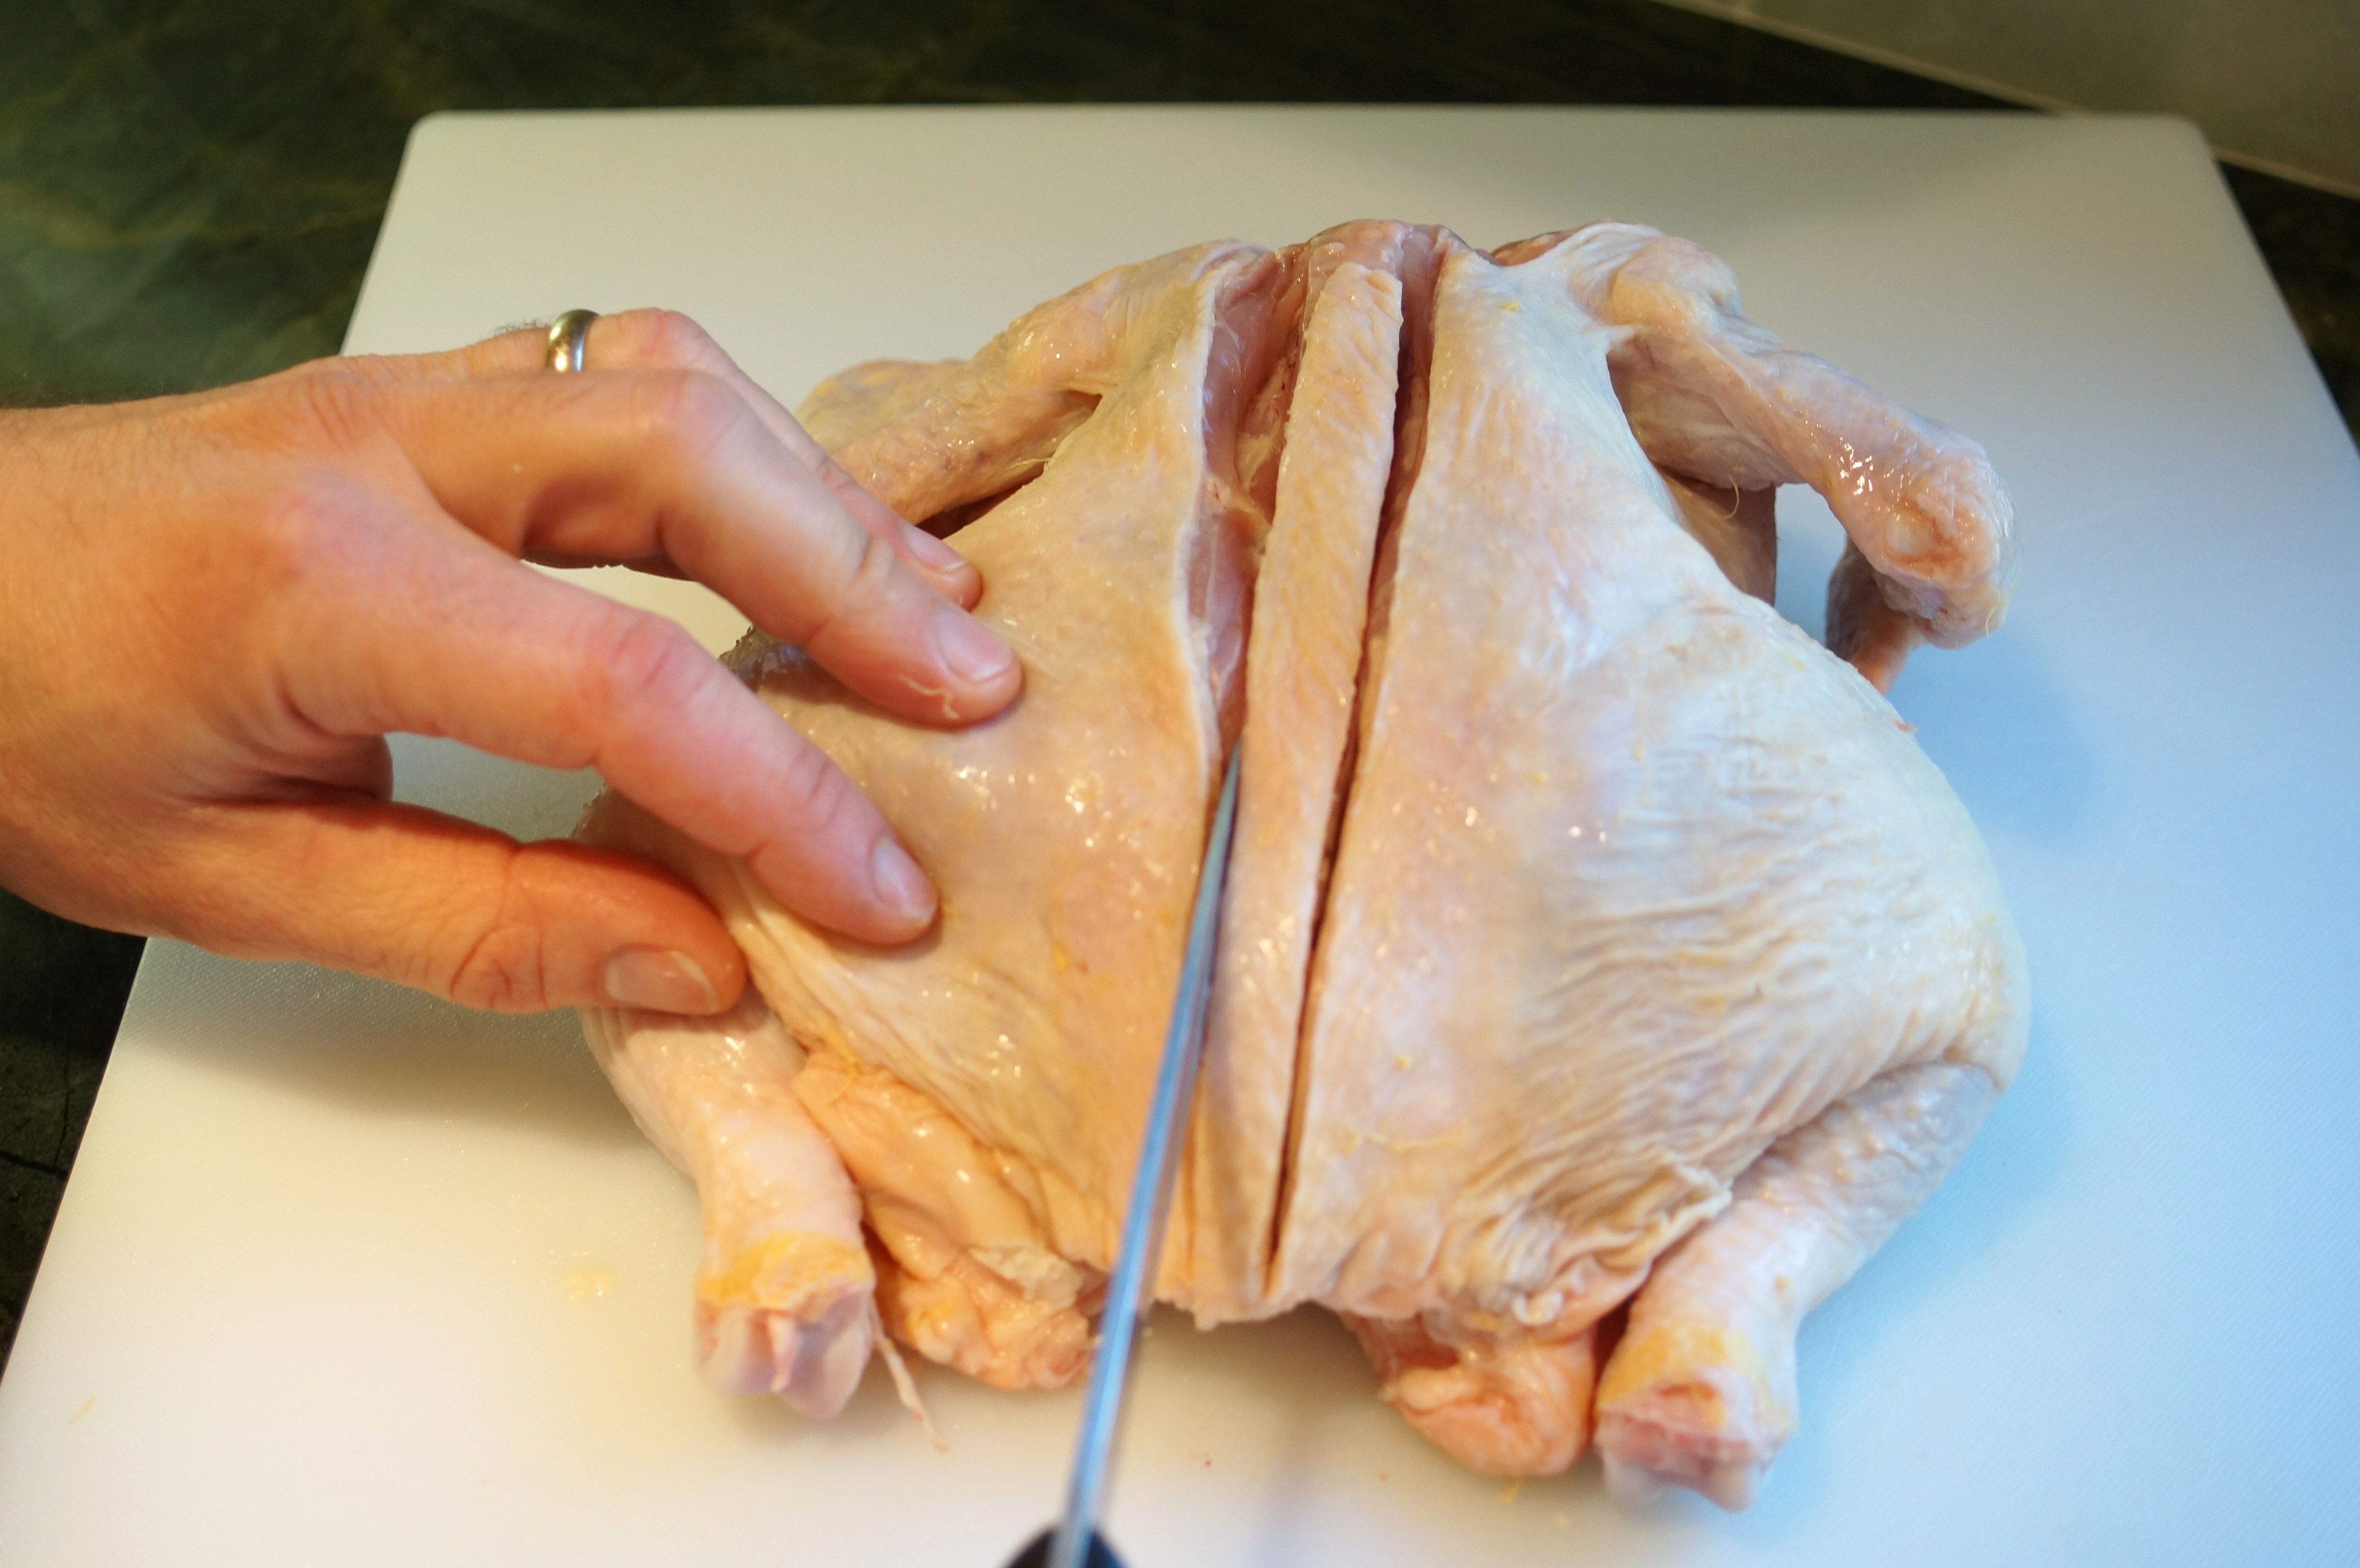
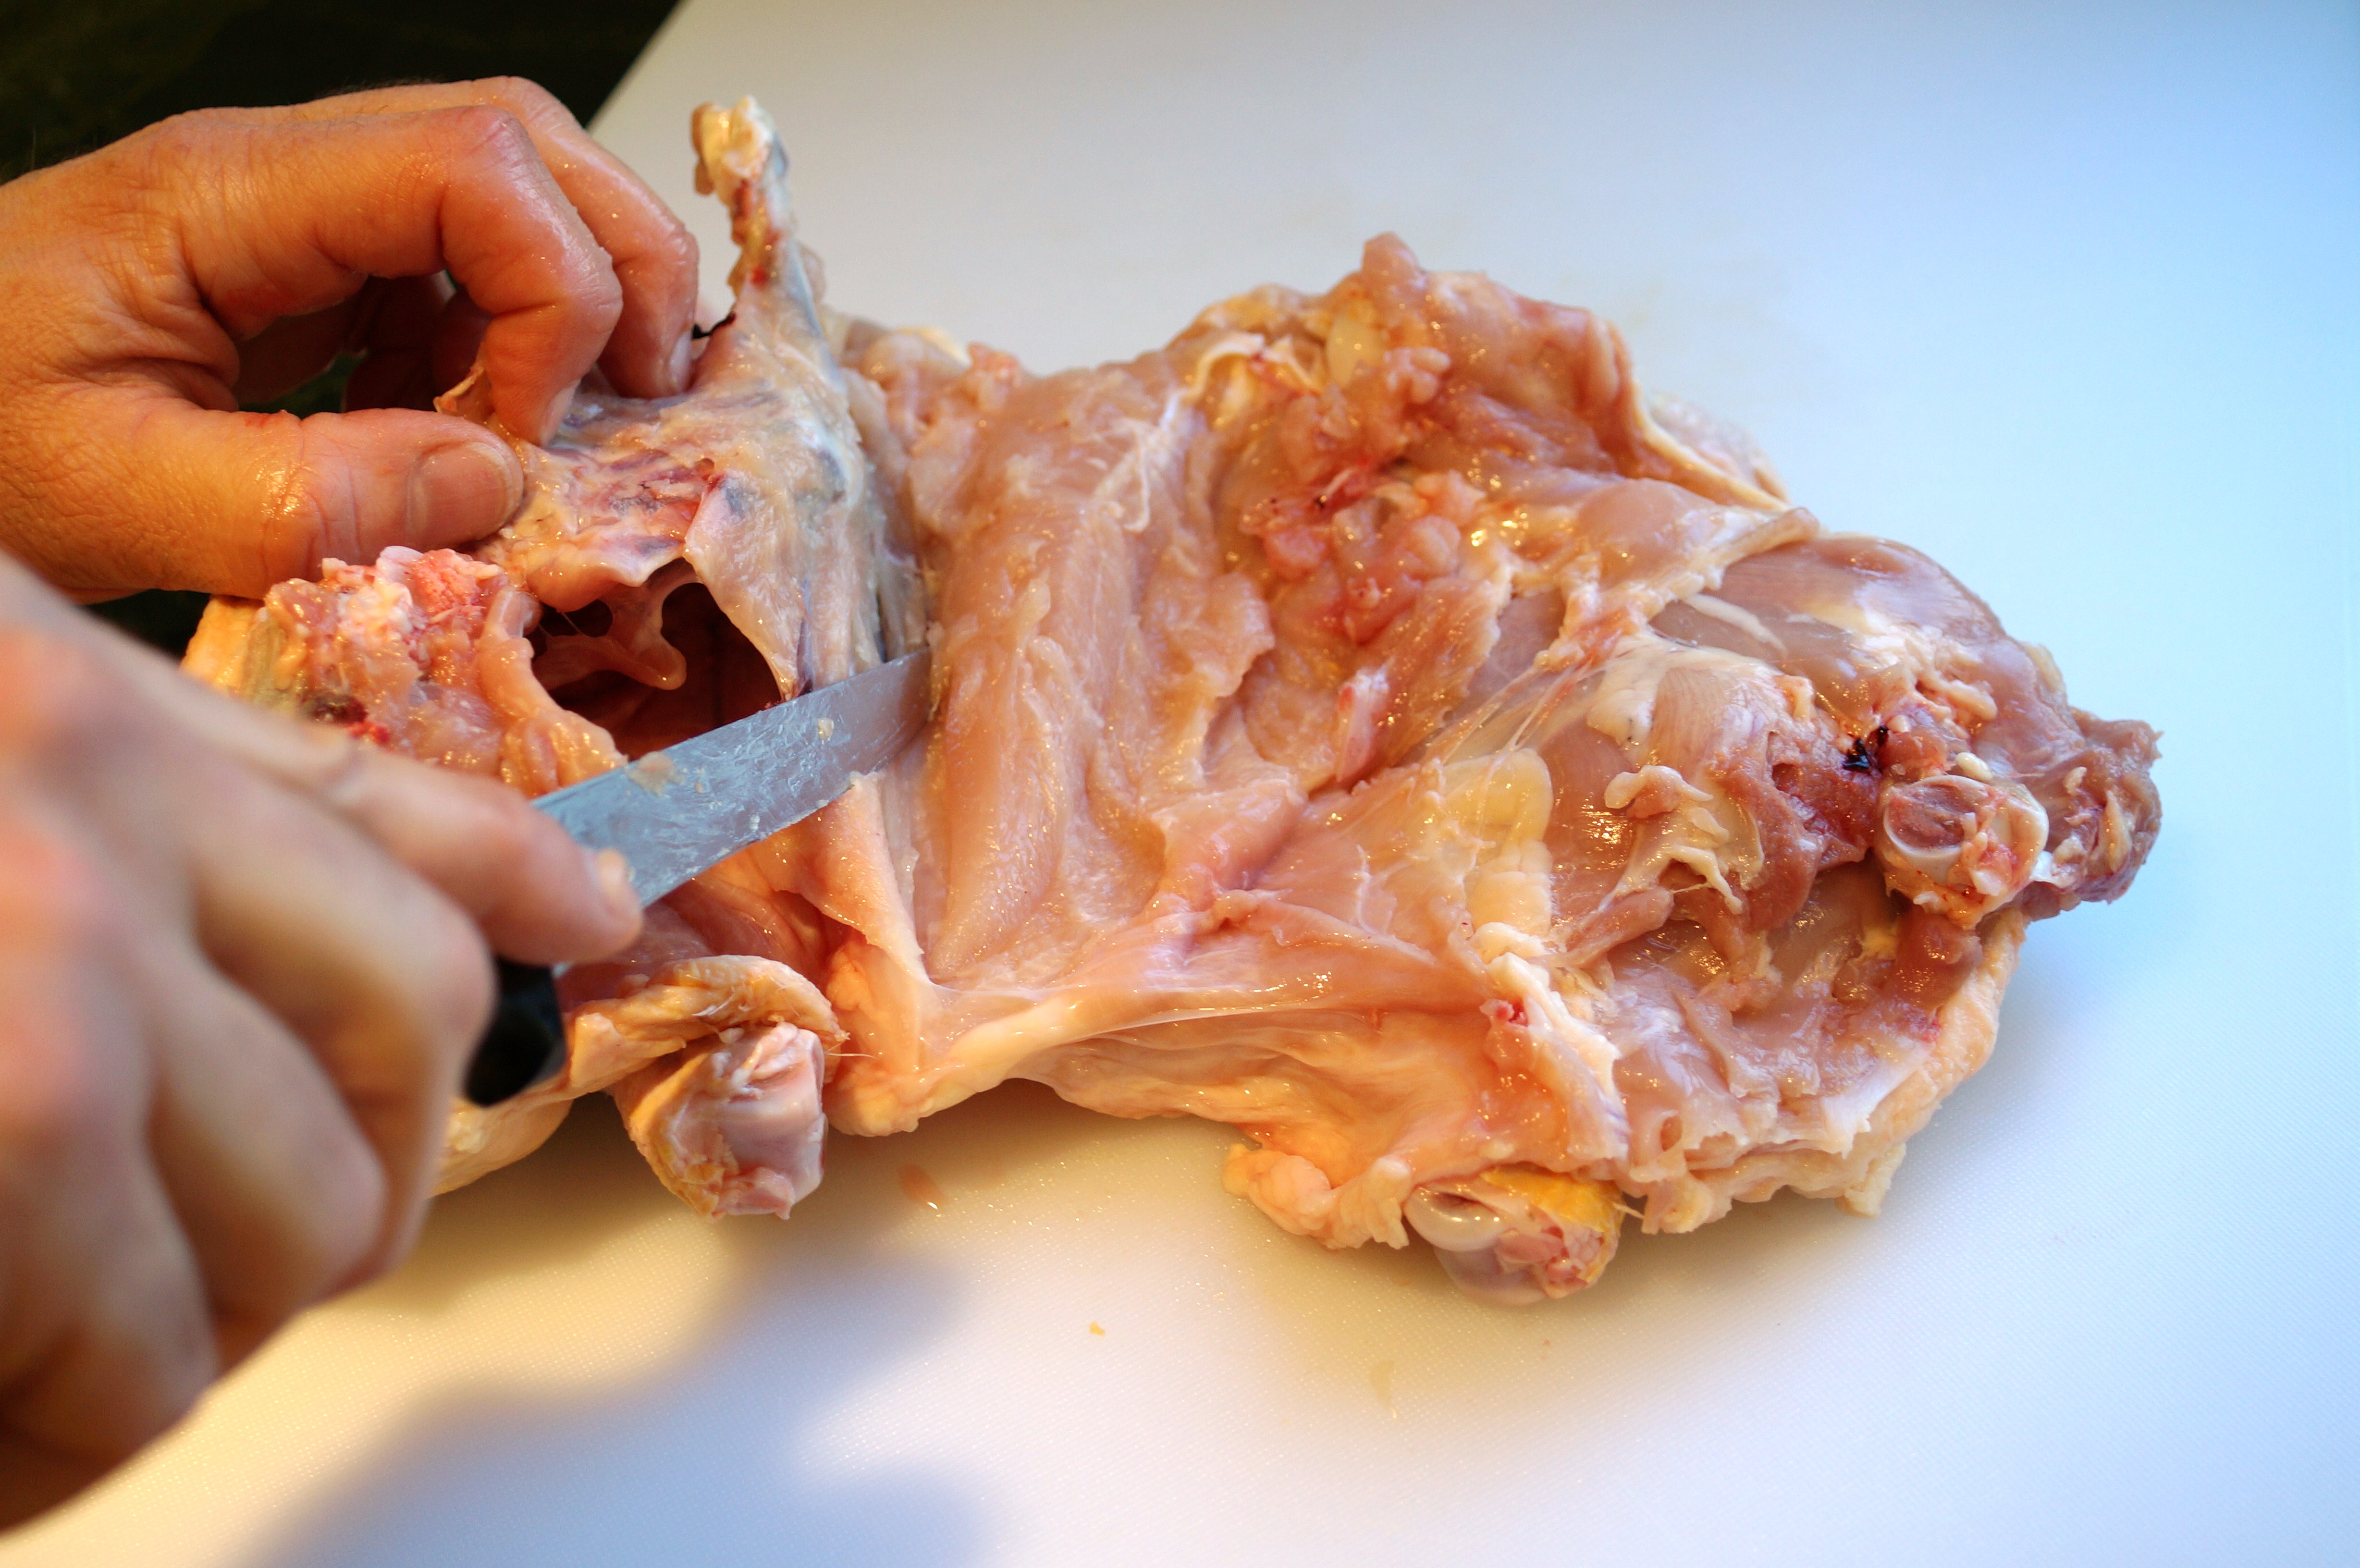
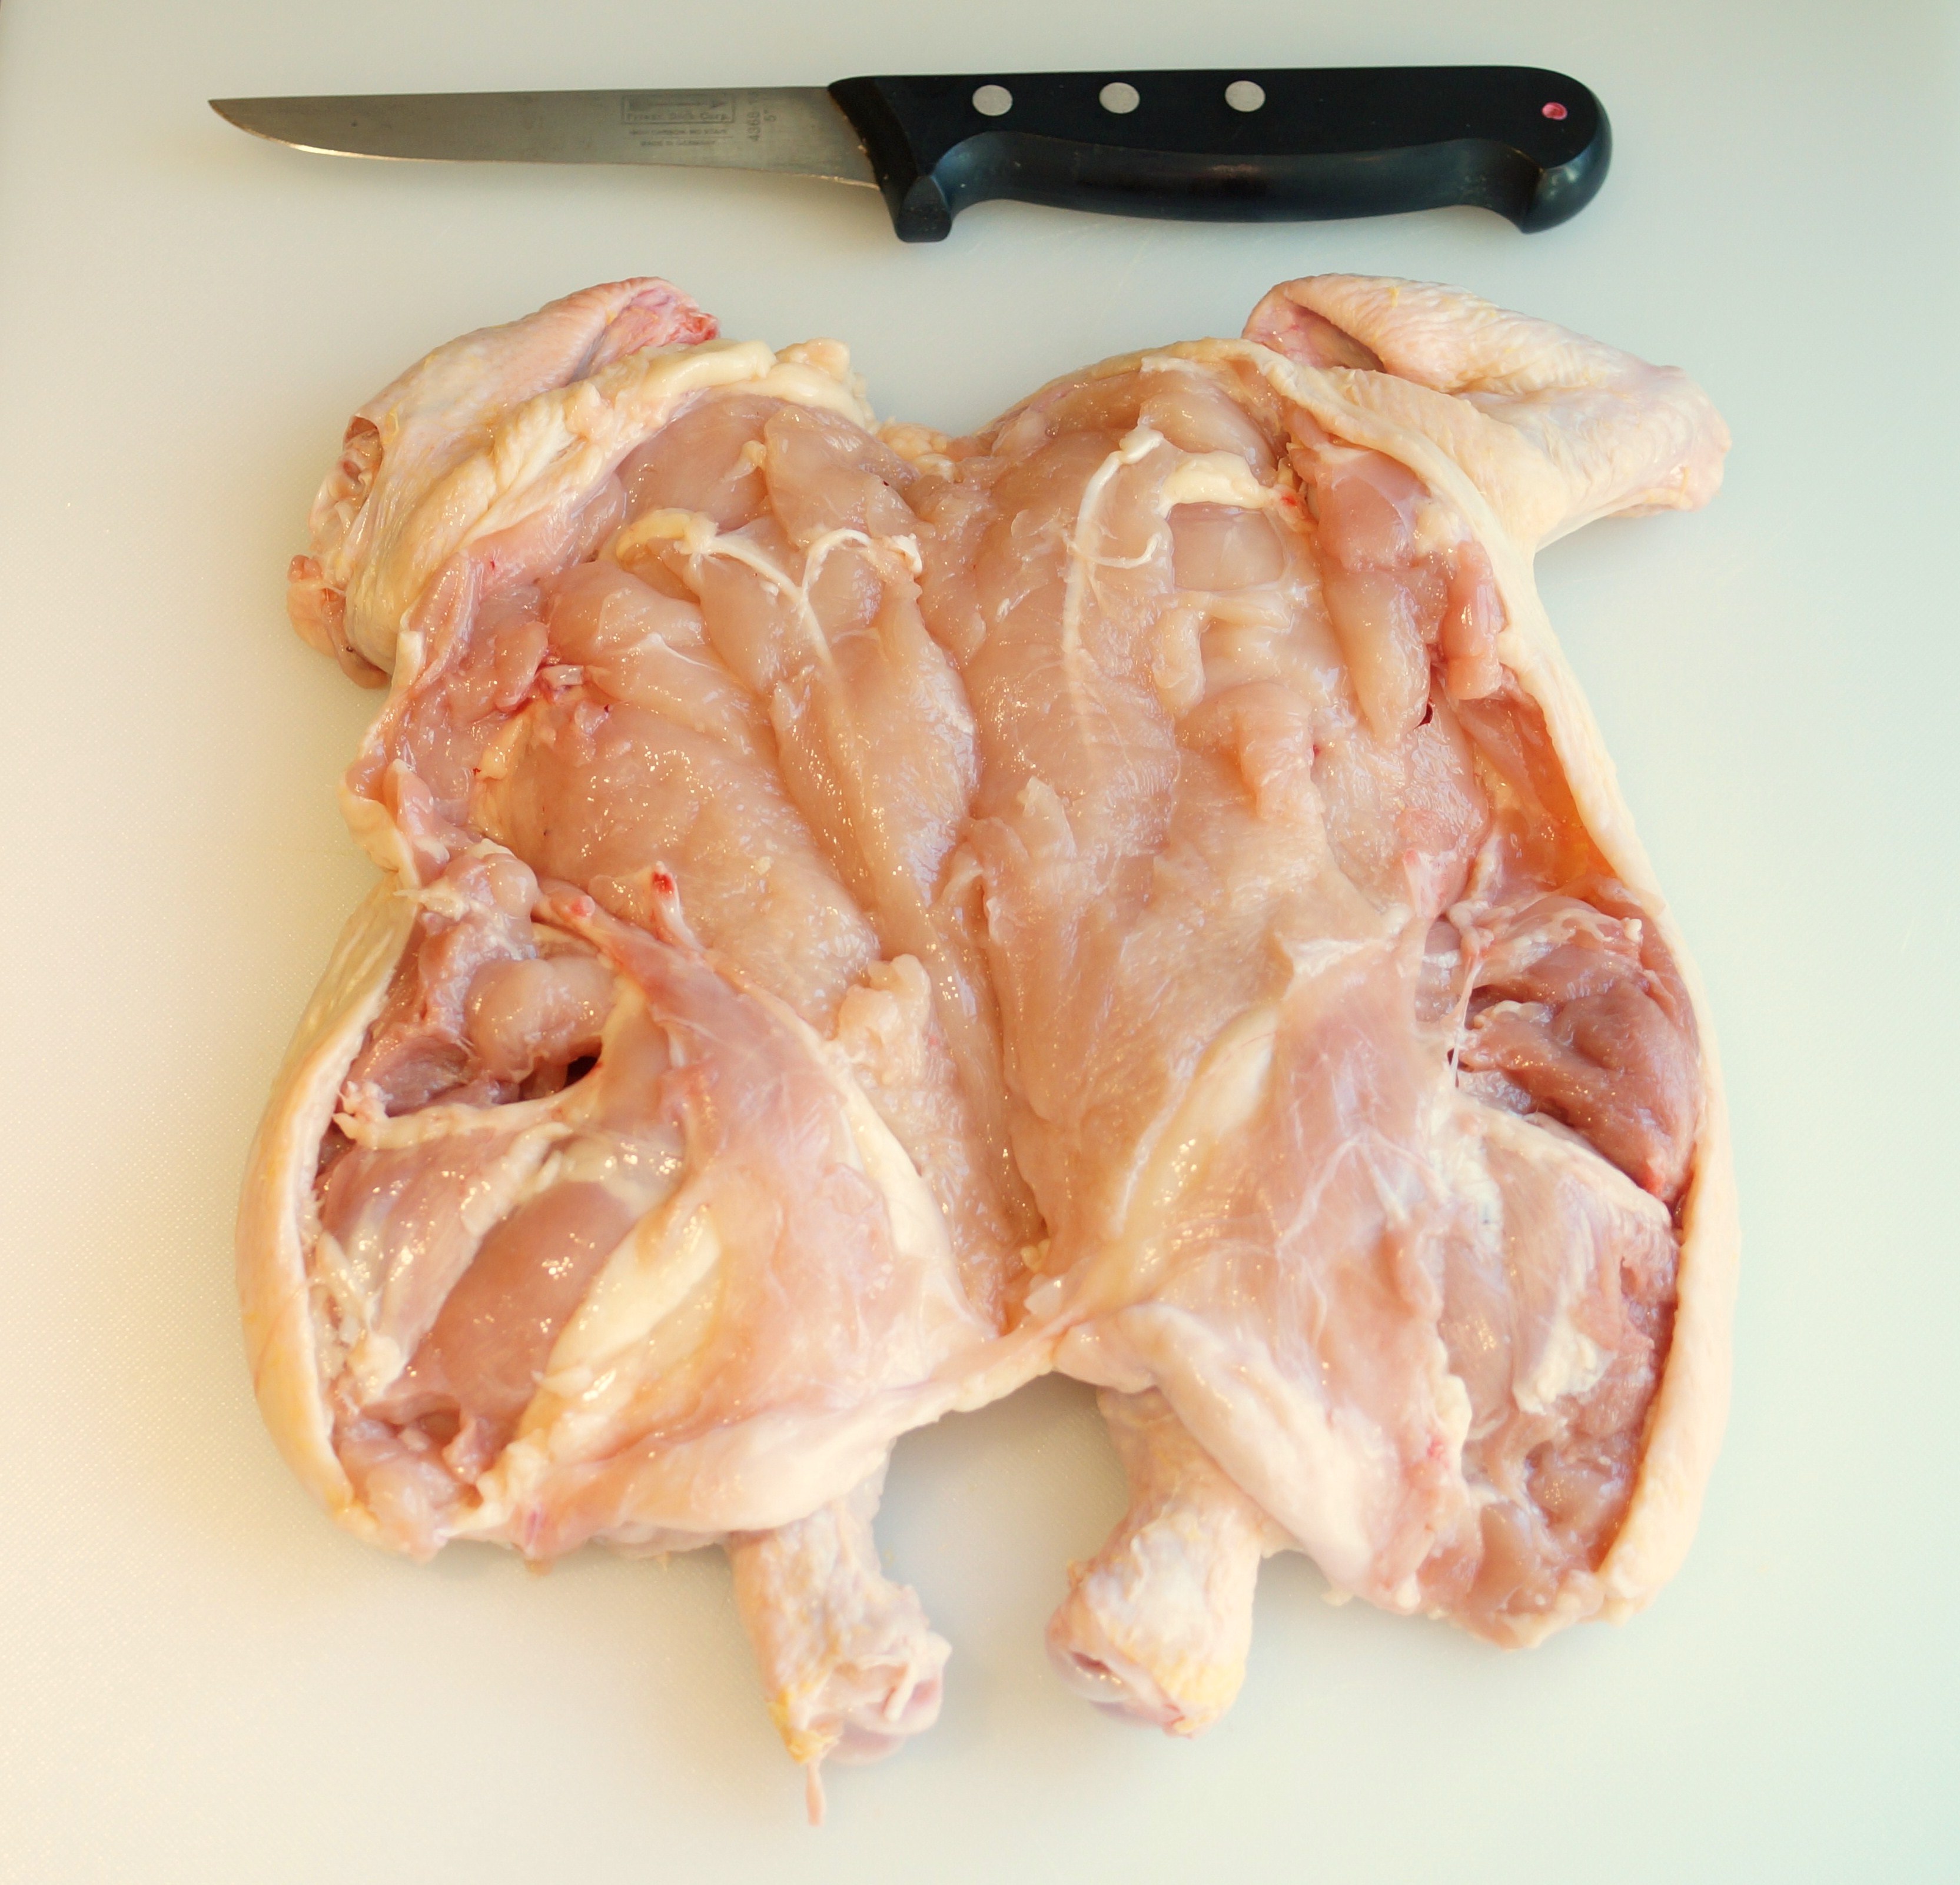
Position the chicken so the breast side is lying flat on your work surface and the backbone is facing up. Make an incision on each side of the backbone. The cuts should run horizontal to the backbone and be deep enough to cut through the skin and meat but not deep enough to cut through the bone.
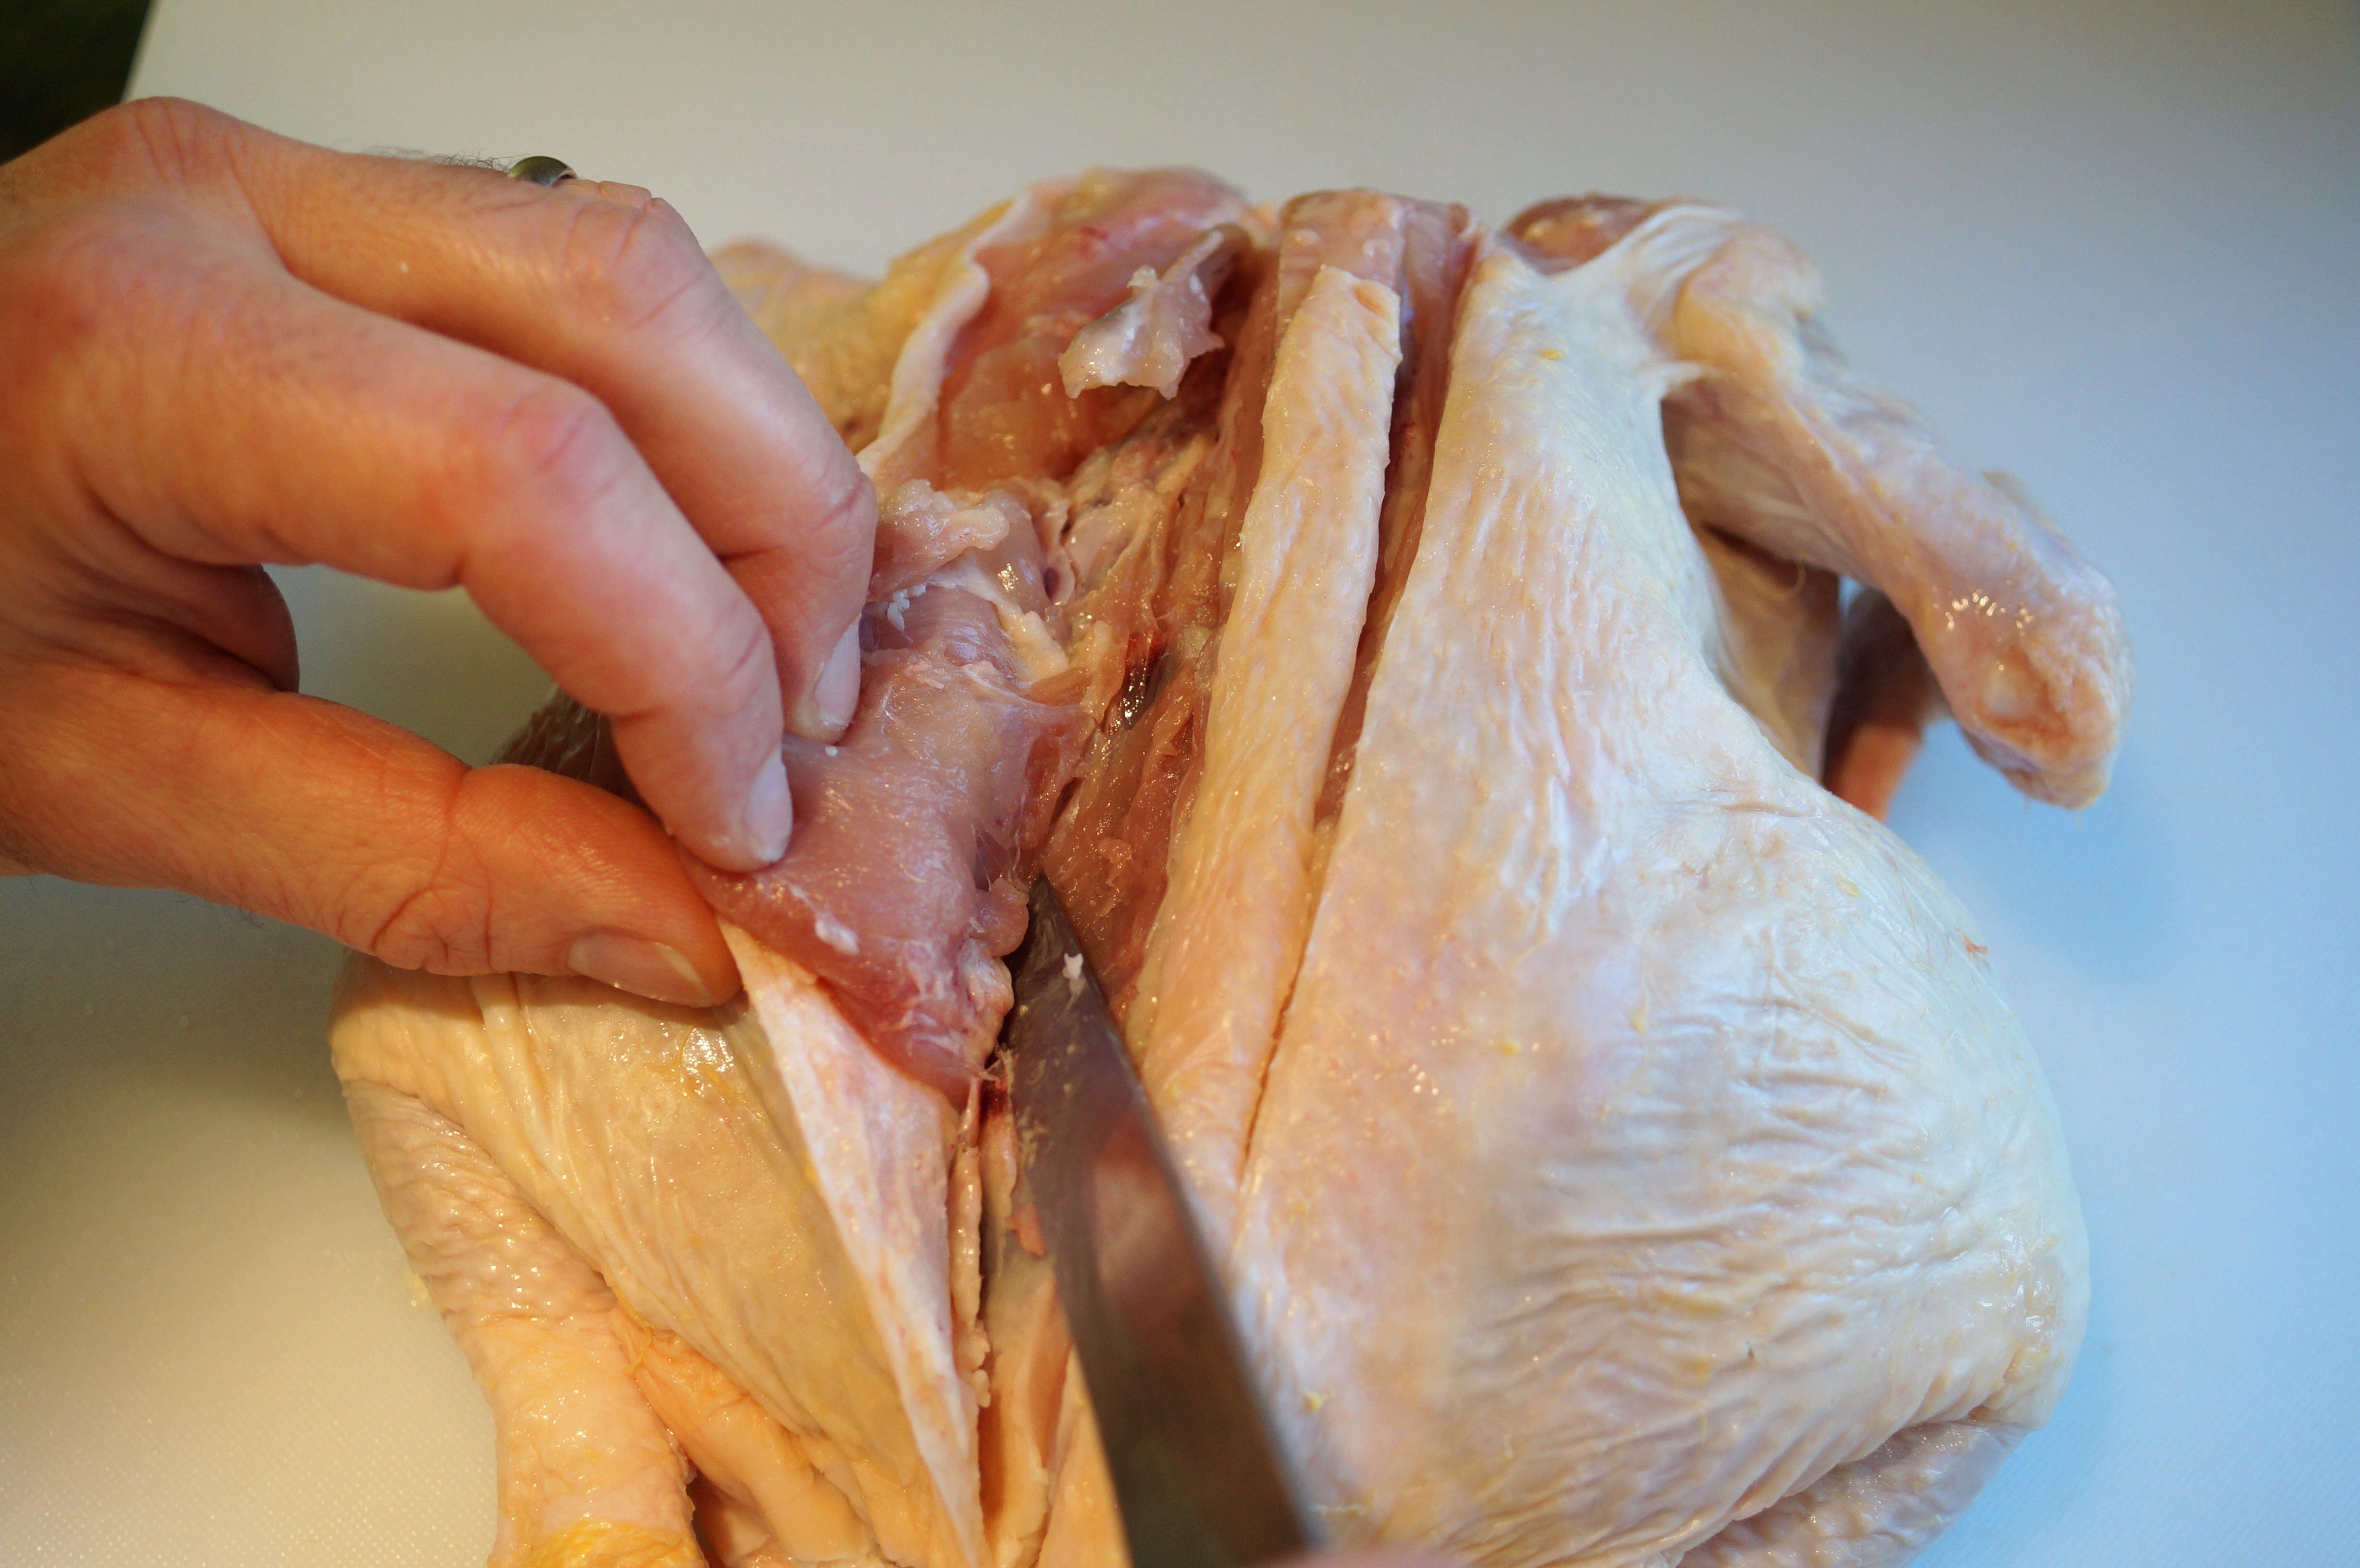
Spread one of the incisions apart and locate the scapula or should blade bone near the neck side of the bird. Make a shallow cut along both sides of the scapula, and then run the knife blade underneath it. This will expose the entire bone.
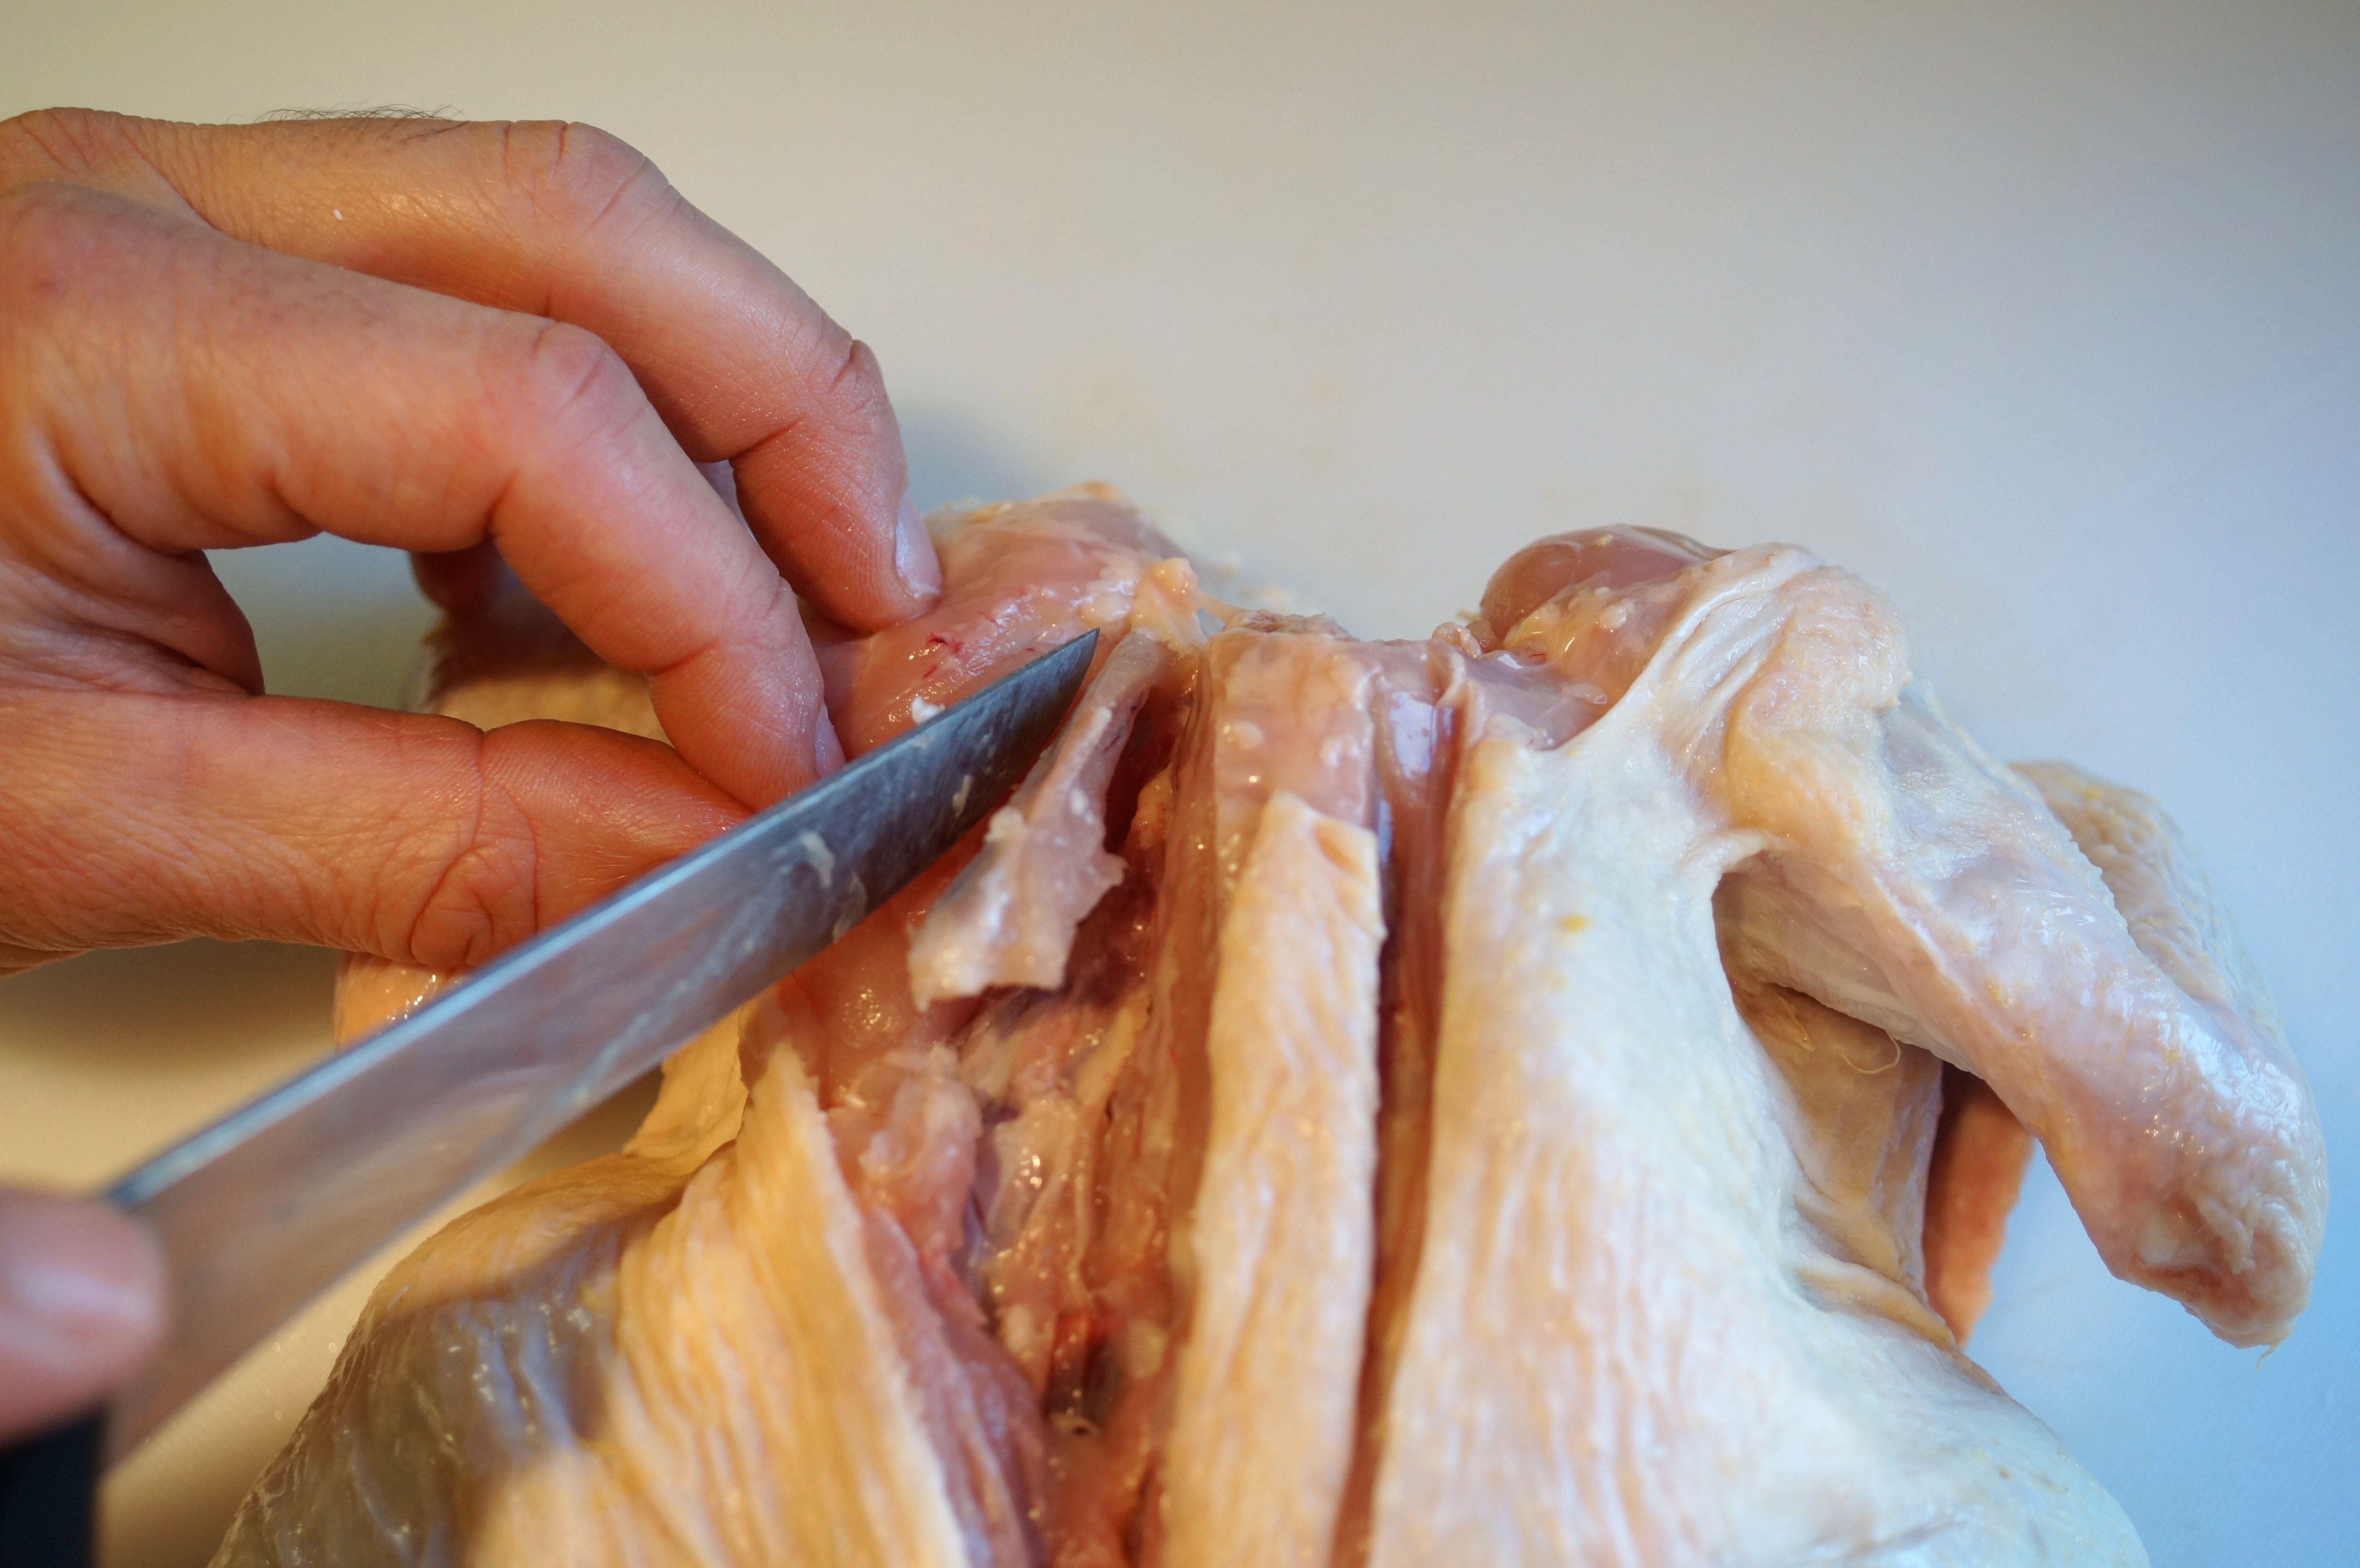
Slip your finger underneath the bone and pull it straight up. Cut through the cartilage that secures it to the bird. Remove and discard the bone. Repeat procedure on the other side of the bird.

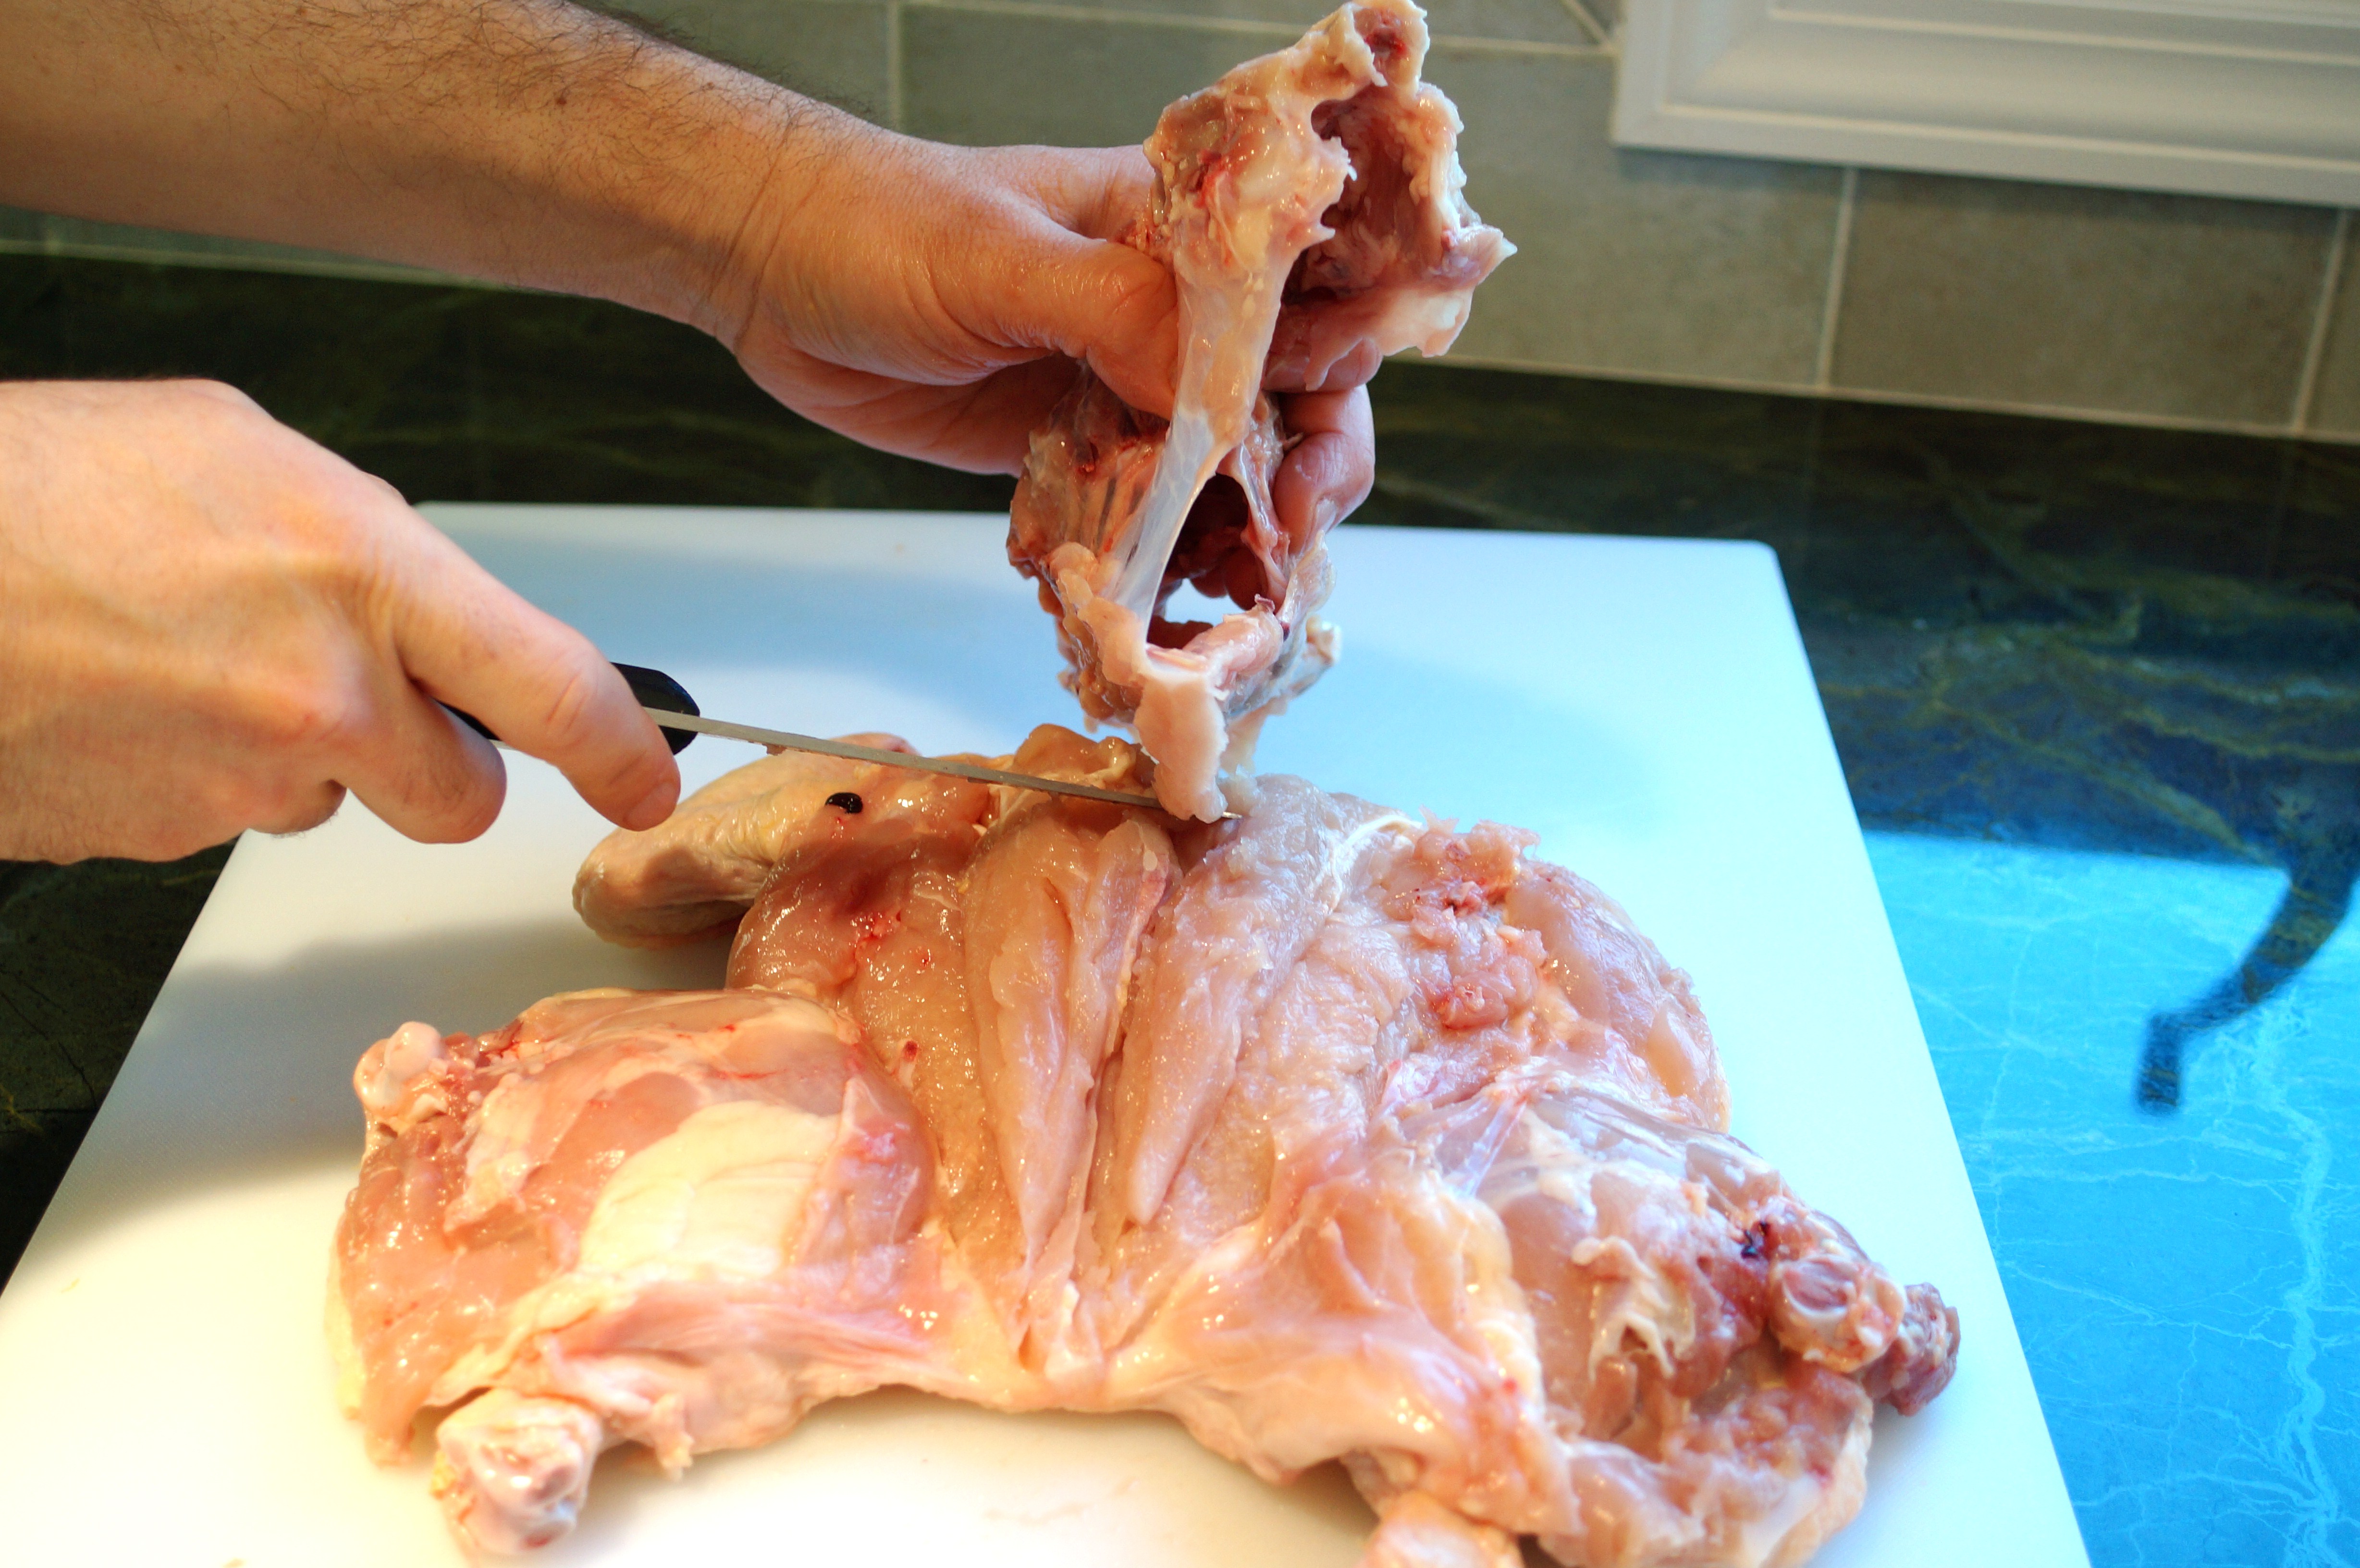
The “oyster” is a round morsel of meat that can be found where the thigh meets the body of the bird. Insert the knife blade into the oyster socket and cut the meat free from the chicken’s carcass. The oyster should remain attached to the chicken’s thigh.
Spread the incision apart and locate the ball joint that connects the leg and thigh to the body of the bird. Insert the knife blade into the ball joint and cut through the tendons that keep the leg attached to the rest of the chicken. This should free the leg and from the main skeletal structure. Repeat procedure on the other side.
Beginning on one side of the backbone, run your knife blade as close as possible along the contour of the chicken’s skeletal structure. Slice away the flesh as you work your way down to the bird’s sternum or breastbone. Be careful not to cut too deep or you’ll puncture the bird’s skin.
Repeat the procedure on the other side. Gently continue cutting down both sides of the sternum until the cartilage becomes soft. Cut through the soft breastbone tissue and remove the bird’s main skeletal structure. Discards the bones or save them for making chicken stock.
Grab the thigh bone by end that once connected it to the chicken’s body. Hold the ball of the thigh bone in one hand, and gently scrape the meat off the bone using the blade of knife. Work your way down to the knee-joint.
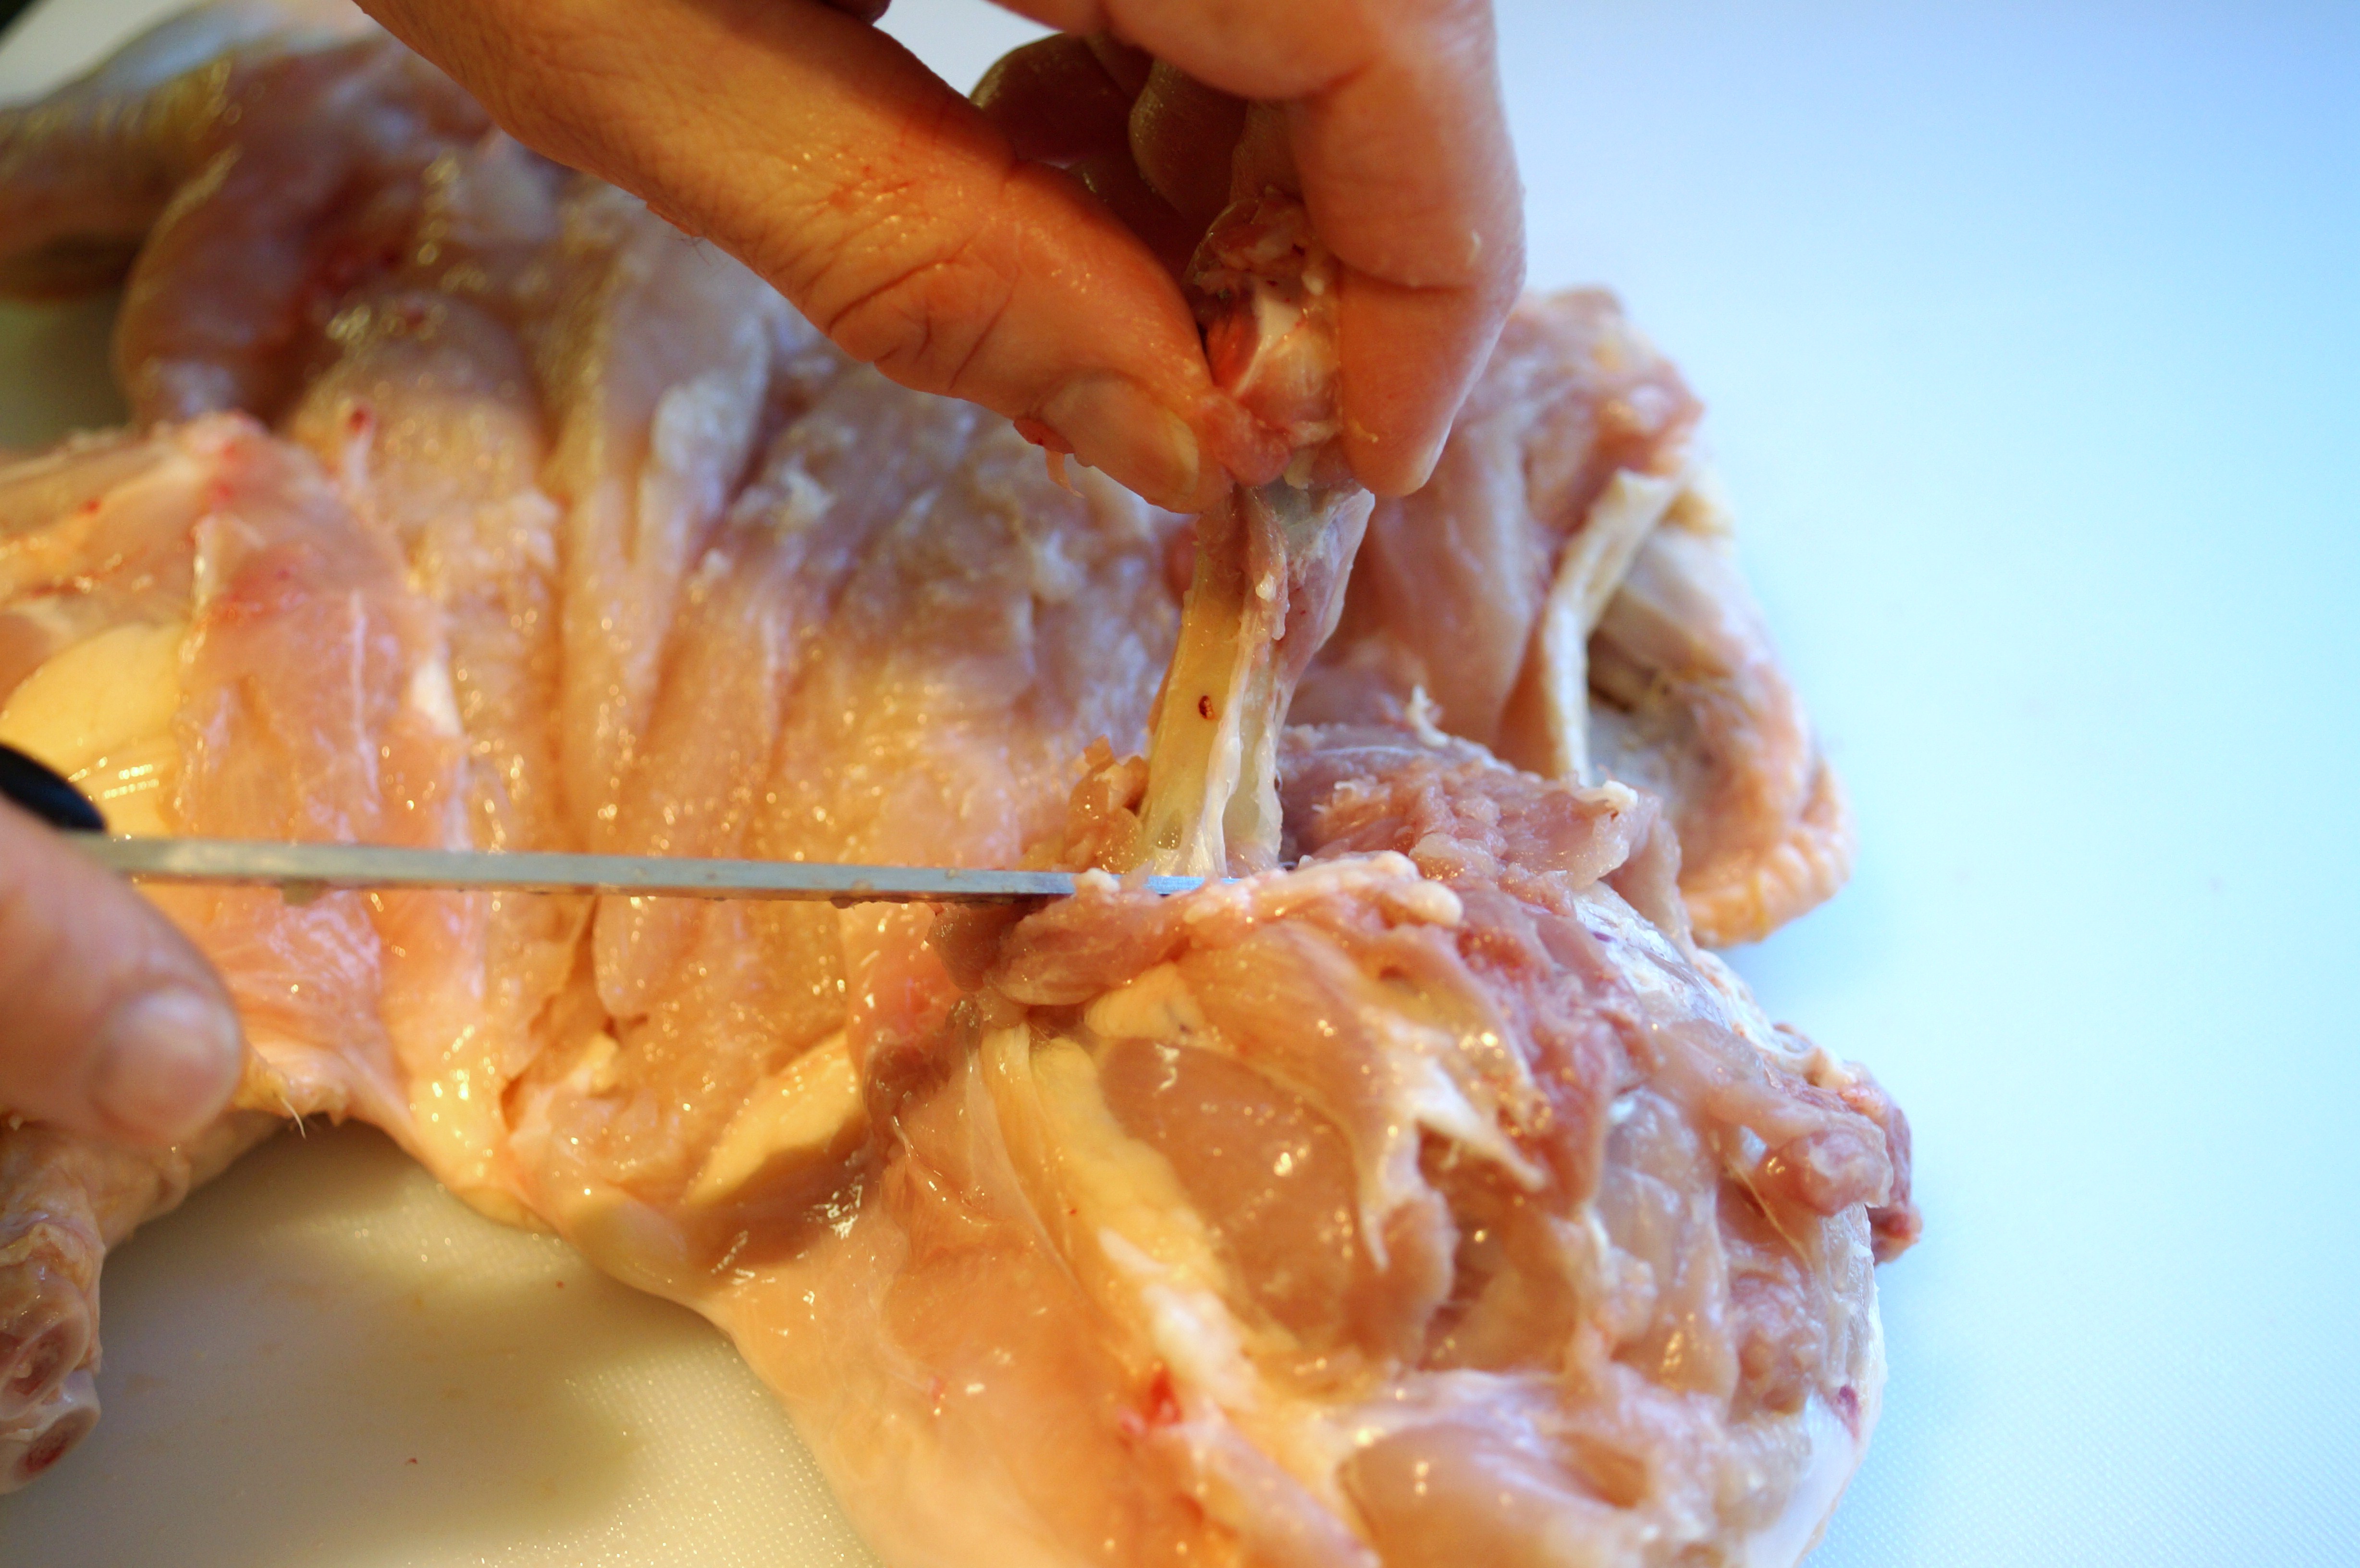
Insert the point of the knife into the knee-joint and cut the tendons that hold the thigh bone in place. Discard thigh bone and repeat procedure on the other leg.

Trim off any unwanted fat or cartilage. The chicken is now boned and ready for stuffing.


An excellent presentation. Thank you for the lesson. Fae.
Whenever I see a trussed chicken I think of the book 50 Shades of Chicken now. This is a very informative post, as I am a huge fan of spatchcocked chicken!
Thanks for the encouraging words. We appreciate you visiting our blog.
Chris & Janine
Super helpful, thanks!
Thank you for visiting our blog. We appreciate it!
Chris & Janine